
· Holt Ferris
Fly Tying Vise Maintenance
A tying vise spends its working life in a small storm of the material you are tying with. Wax comes off the thread onto the jaw faces, clippings settle into every gap in the head, and head cement finds the one place you did not intend it to go. It turns into a problem slowly: a head that turned smoothly goes notchy halfway round, a hook that used to sit still creeps a few degrees between the tail and the whip finish, and you spend an evening blaming your hands.
Almost everything that changes over a season falls into three groups. Something has landed on it and needs taking off. Something is damp and needs drying. Something has moved and needs re-setting. That a part has genuinely worn is rarer than all three, and the useful skill is telling it apart from them.
Wax and thread residue on the jaw faces
Tying wax is designed to be tacky, and thread carries it onto the two faces that grip the hook. That is the one surface where a film changes something you can measure: a wax layer is compliant, and compliance is what lets a shank turn under sustained thread tension, however well the jaws are set.
The fix is a dry cloth over the jaw faces at the end of a session, while the wax is fresh and lifts dry. Two details do most of the work in that wipe. Open the jaws first, because half of what accumulates lives on the inner faces you cannot see when they are closed. And wipe along the slot rather than across it, so you are not driving cloth fibres into the narrow gap where the faces meet.
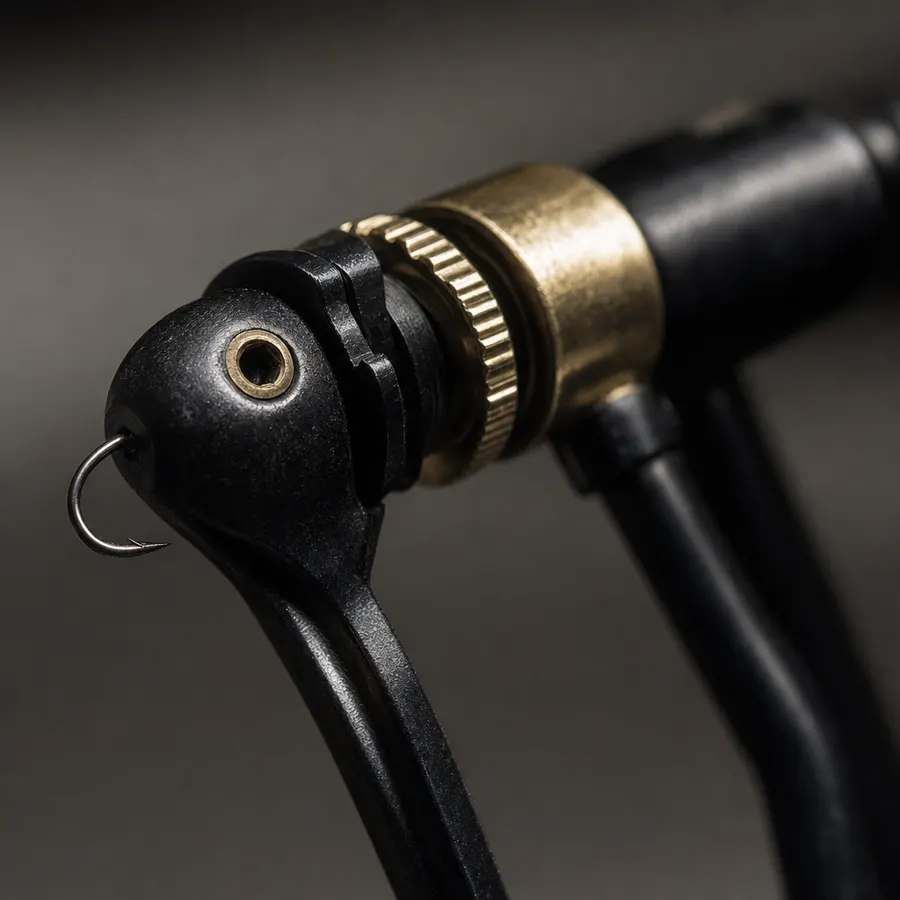
Head cement and varnish: the residue that sets hard
A finishing coat is built to set, and it sets just as willingly on a jaw tip as on a thread head. It gets there in ordinary ways: a bodkin loaded too generously, or a coat applied while the head is turning so it spreads around the shank — the technique our rotary vise guide recommends, and the moment a drop is most likely to reach the jaws. UV resin has its own version: a smear in the shade of the jaw never gets the light it needs, stays tacky, and collects everything that lands on it.
So the most valuable habit here is a thirty-second one. In the minute after you coat a head, a cloth takes a stray drop off the jaw completely and the problem never exists.
Once it has cured, work mechanically first, and work with something softer than the jaw: a toothpick, a sharpened matchstick, the edge of a fingernail. Cured coatings are brittle, and a blob on a smooth steel face usually pops off in one piece under a wooden point. What does not belong near the gripping faces is a blade, wire wool or an abrasive pad. Hardened steel is hard, but those faces are a machined geometry whose flatness is why a hook stays where you put it, and a score across them sits exactly where the hook sits.
If that does not finish the job and you reach for a solvent, the useful answer is to test rather than to name a product. Two things decide what is safe: what the coating was, since cements, varnishes and resins are different chemistries, and what the surface is. A vise head is not one material — ours pairs a hardened-steel jaw with brass rings on a black finish — and something that leaves bare steel alone can still dull a finish an inch away. Test underneath the clamp, look at it in daylight, and only then go near the jaws. And keep liquid away from the joint the head rotates in: a solvent that runs in there carries dissolved residue into the bearing surfaces, the one place a cloth cannot follow it.
Dust and clippings in the mechanism
Trimmed thread ends, dubbing fibres and hackle fluff are light enough to go anywhere and fine enough to pack. They find the gap behind the jaws, the collar threads, the lever pivot and the joint the head turns in. You feel it before you see it: a notchy lever, a gritty patch halfway round the turn.
Both symptoms already have their fix on this site, and it is the same dry cloth — the stiff-lever case in our guide to the lever on a fly tying vise, the gritty-rotation case in the rotary vise guide. What neither covers is the part that stops you needing the fix, which is direction. Clip over the desk rather than over the head, and brush away from the openings rather than across them, because a soft brush aimed at a gap is an efficient way of packing it. Blowing hard at a bearing drives the finest dust further in and adds moisture from your breath; turning the head so the opening faces down and letting gravity work moves debris the right way.
And when a head feels gritty, resist putting something on it. Grit here is nearly always material that has arrived, not lubrication that has gone, and oil over packed dust makes a paste that holds the next week of it in place. Take material off first. If you then leave a light film somewhere for corrosion, keep it off the jaw faces — they hold a hook by friction — and off any surface thread runs across.
A damp season, and what it does to a hardened-steel jaw
A hardened-steel jaw resists the groove a softer jaw wears into itself at the exact spot a hook sits, which is why it is the material that belongs at the tip. What hardness does not do is stop it being steel, and salt air, a wet wading bag or a garage over a winter apply to any steel tool that lives near water.
The moment that does the damage is usually not the rain but the temperature change. A cold vise carried into a warm room, or a warm one zipped into a cold bag, condenses water onto its own surfaces without anything getting visibly wet. Which is why the habit that matters is drying it when you put it away, not when you next get it out.
Hook sizes the Tailwater jaw closes on without an adapter
— Tailwater measurements, 2026
If something does appear, the distinction that matters is between a surface bloom and pitting. A bloom sits on top and comes away with a dry cloth, or one carrying a light oil. Pitting has eaten in, and on the jaw faces that stops being cosmetic, because those faces grip by contact and pitting changes what contacts what.
This is where to stop rather than push on. On the body, taking an abrasive to it is a decision about looks; on the gripping faces it is a decision about geometry, and an abrasive removes metal from the one surface whose flatness is the point. A jaw face past what a cloth will do is a case for getting in touch with us rather than for grinding.
When play shows up in the head
Play announces itself the same way every time: the fly no longer lands quite where you left it, and pushing the shank produces a small movement that was not there in the first week. Nearly every case reported early on is not wear, and all three usual causes are re-settable in under a minute. The clamp is flexing, because a hollow-core desk gives where a solid bench edge does not — the working-surface question our fly tying desk guide goes through. The collar is set too loose for the wire. Or the lever has not been pushed fully home, so the cam rests on its high point and walks itself open as tension builds; both of those are covered with their fixes in the lever guide. Work through all three before concluding anything about wear, because at the hook they feel identical.
One test separates them, and costs nothing. Rest a fingertip on the head and push the hook sideways. If the head moves with the hook, the movement is behind the jaws — a clamp, a joint, a fastener. If the hook moves and the head stays put, it is in the grip, which is a clamping-force setting rather than anything structural.
Screws that work loose, and the one to leave alone
Thumb screws on a C-clamp back off. The small repeated pushes of tying do some of it, and the desk does the rest: a wooden edge changes dimension with the seasons, so a clamp set snug in a humid August is not the same clamp in a dry January. Checking both by hand at the start of a session takes a second and is the cheapest habit on this page.
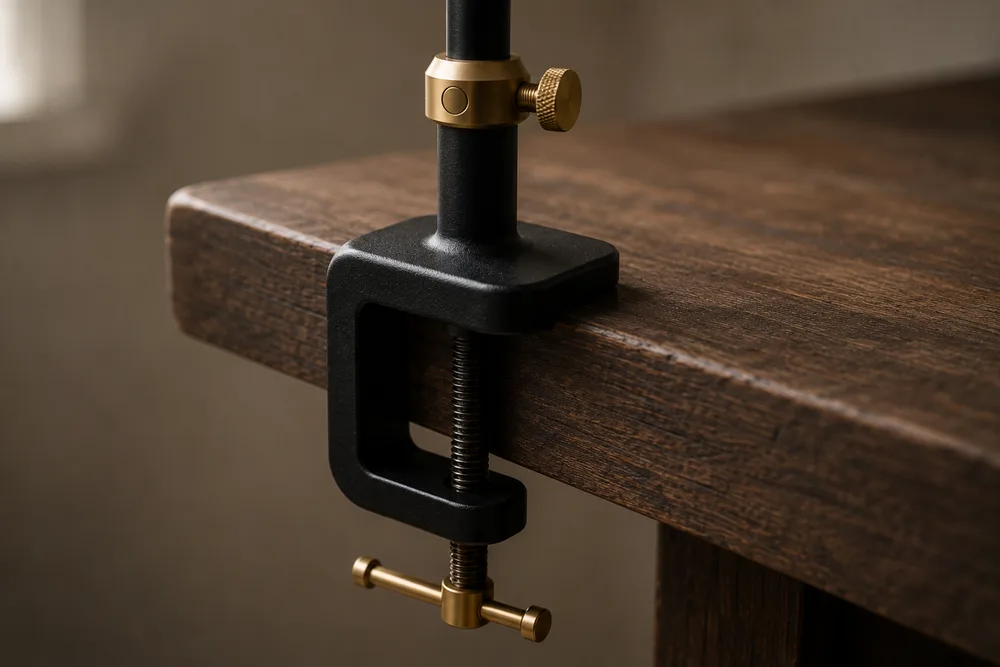
Snug is the target, not hard. Past a snug fit you are stressing the clamp threads without adding holding power, and on a two-screw base the answer to a clamp that still moves is almost always the second screw rather than more force on the first. Repeat the check whenever the vise moves to a different desk, because thickness and edge profile change what snug means.
The fastener to leave alone is the pivot the lever swings on. It is not an adjustment, and over-tightening a pivot binds the arc the cam has to travel through. A lever that swings freely but lets the hook turn is telling you about the collar setting, not about its pivot.
Putting the vise away, between sessions and between seasons
If you are tying again tomorrow, it stays clamped. If not, back the clamp off a turn or two, which takes tension off the desk edge without your having to remove the vise at all — the end-of-session routine our guide to tying your first fly introduces alongside brushing down the jaws.
Where it goes next matters more than people expect. A vise loose in a drawer with other tools gets knocked, and what it gets knocked on is the jaw tips, the part whose alignment you care about most. Anything with a pocket — a tool roll, a padded pouch, its own compartment in a box — does the one job that needs doing: keeping other steel off those faces.
Leave the jaws roughly where they naturally sit rather than cammed hard shut on nothing: clamped on empty air they are a spring held under load for the whole off-season, for no reason.
For a longer break the two rules combine: it goes away dry, and it does not live in the bag it travelled home wet in. A drawer indoors beats a garage shelf, for the same condensation reason as above, and hooks and materials want exactly the same treatment.
Maintaining the Tailwater vise
A few things about our rotary fly tying vise decide how the routine plays out on it. The jaw is hardened steel ringed in brass, so the tip resists the groove softer jaws wear at the hook seat, and the wipe it wants is a dry one along the slot. The head rides on brass bushings and turns a full 360 degrees independently of the jaws, so the residue reaching the rotating collar and the residue on the gripping faces are two separate wipes. And the base is a C-clamp with two brass-knurled thumb screws, so a clamp that moves is a prompt to even the two up rather than to lean on one.
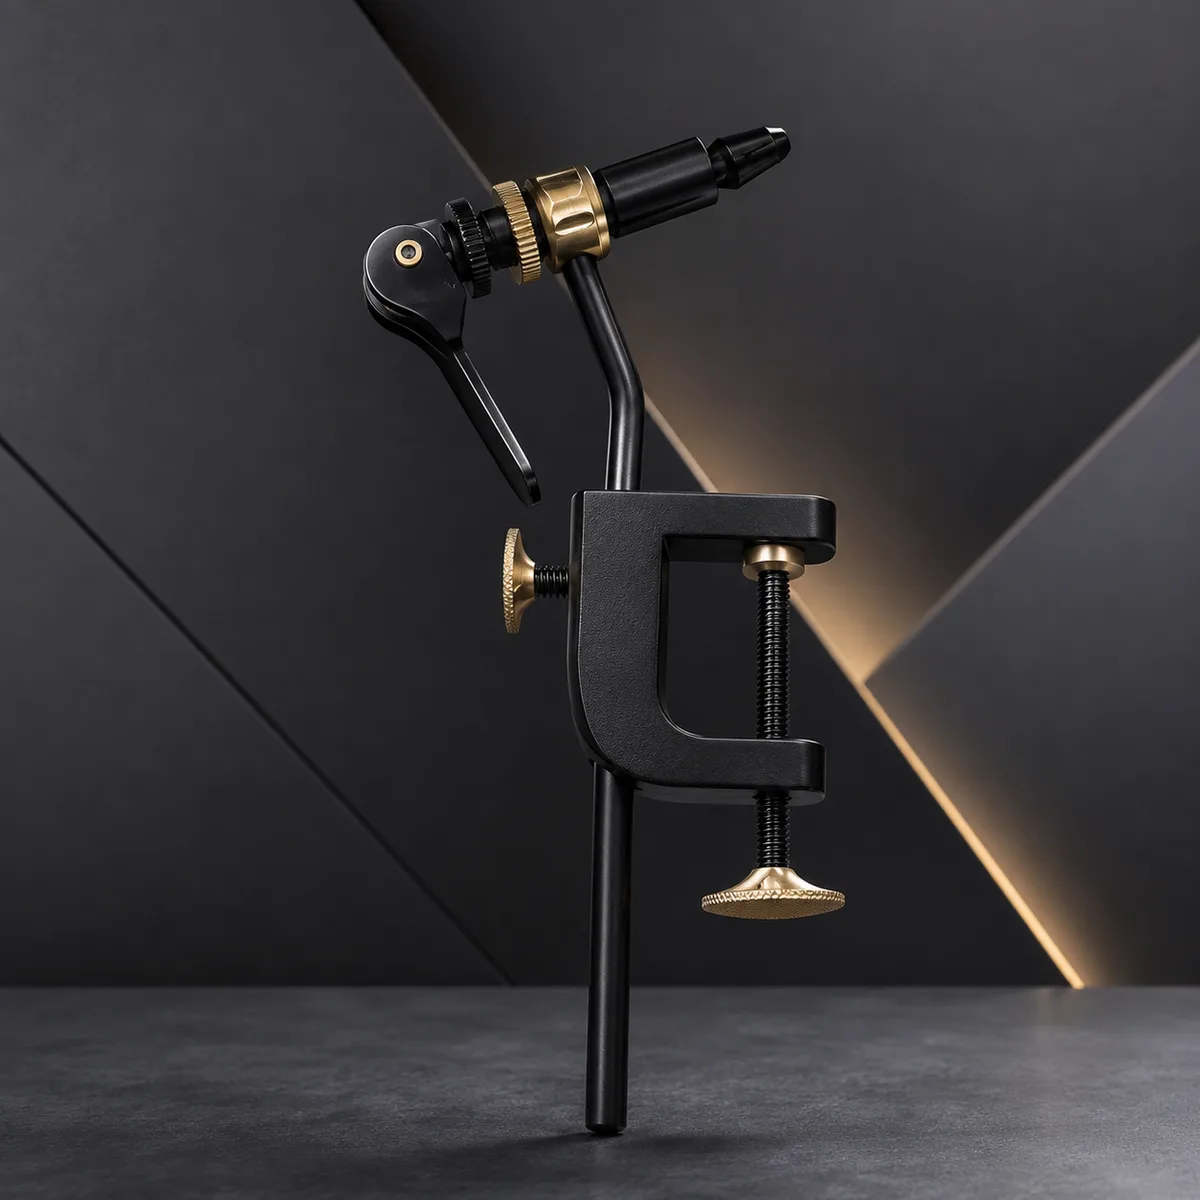
It is $49.95 on its own, or $79.95 inside the Complete Fly Tying Kit with the bobbin holder, whip finisher, hackle pliers, tweezers and thread a first bench needs. Comparing all three setups side by side, with what buyers report on jaw hold after a season, is what our best fly tying vise page is for.
Average rating across 47 verified buyers
— Tailwater verified purchase data, 2026
Fly tying vise maintenance FAQ
How do you clean a fly tying vise?
A dry cloth over the jaw faces and the head at the end of a session covers most of it. Open the jaws first, because half of what collects sits on the inner faces you cannot see when they are shut, and wipe along the slot rather than across it. Take material off before you put anything on, and keep liquids away from the joint the head turns in.
Should you oil a fly tying vise?
A gritty head is usually material that has arrived rather than lubrication that has gone, so removing comes first — oil over packed dust makes a paste that holds the next week of it in place. If you leave a light film somewhere for corrosion, keep it off the jaw faces and off any surface thread runs across: the faces hold a hook by friction.
How do you get dried head cement off vise jaws?
While it is still soft, a cloth takes it off completely, which is why the minute after you coat a head is the cheapest minute in the routine. Once cured, lift it mechanically with something softer than the jaw — a toothpick, a matchstick, a fingernail — never a blade, wire wool or an abrasive on the gripping faces. Test any solvent somewhere that does not show first, because coatings and finishes do not all react the same way.

Holt Ferris · Fly Tyer and Guide, 15 Seasons on the Water
Fly fishing guide and tyer for 15 seasons. I have clamped a lot of vises to a lot of benches, in drift boats and in kitchens at midnight before an early hatch.